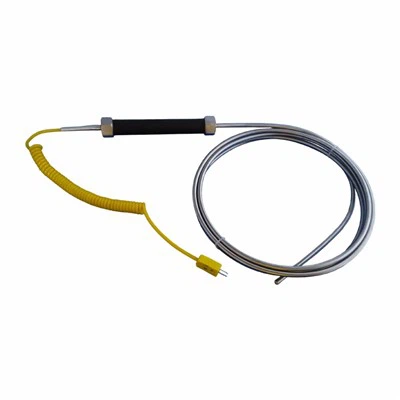
Installing thermocouples in a heat exchanger is a crucial process that requires careful planning and execution. As a thermocouples supplier, I have witnessed firsthand the importance of proper installation to ensure accurate temperature measurement and the efficient operation of heat exchangers. In this blog post, I will guide you through the step-by-step process of installing thermocouples in a heat exchanger, providing you with valuable insights and tips along the way.
Understanding Thermocouples
Before diving into the installation process, it's essential to understand what thermocouples are and how they work. A thermocouple is a temperature sensor that consists of two different metal wires joined at one end. When there is a temperature difference between the junction (the joined end) and the other end of the wires, a voltage is generated. This voltage is proportional to the temperature difference, allowing us to measure the temperature accurately.
There are different types of thermocouples available, each with its own characteristics and applications. Some common types include Assembled Thermocouple, Magnetic Thermocouple, and Wire Thermocouple. The choice of thermocouple depends on factors such as the temperature range, the environment, and the accuracy requirements.
Step 1: Selecting the Right Thermocouple
The first step in installing thermocouples in a heat exchanger is to select the right type of thermocouple for your application. Consider the following factors when making your selection:
- Temperature Range: Determine the minimum and maximum temperatures that the thermocouple will be exposed to. Different types of thermocouples have different temperature ranges, so choose one that can withstand the temperatures in your heat exchanger.
- Accuracy Requirements: Consider the level of accuracy needed for your temperature measurements. Some applications require high accuracy, while others may tolerate a wider margin of error.
- Environment: Take into account the environment in which the thermocouple will be installed. Factors such as corrosion, vibration, and electromagnetic interference can affect the performance of the thermocouple. Choose a thermocouple that is suitable for the specific environment.
- Installation Method: Consider the installation method that will be used for the thermocouple. Some thermocouples are designed for direct insertion, while others may require a mounting bracket or a thermowell.
Step 2: Planning the Installation
Once you have selected the right thermocouple, it's time to plan the installation. Here are some important considerations:
- Location: Determine the optimal location for installing the thermocouples in the heat exchanger. The location should provide an accurate representation of the temperature of the fluid or material being heated or cooled. Avoid areas with high turbulence, where the temperature may be less stable.
- Number of Thermocouples: Decide how many thermocouples you need to install based on the size and complexity of the heat exchanger. Multiple thermocouples can provide more accurate temperature measurements and help identify any temperature variations within the heat exchanger.
- Mounting Method: Choose the appropriate mounting method for the thermocouples. This may involve using a thermowell, a mounting bracket, or direct insertion. Make sure the mounting method is secure and allows for easy access for maintenance and replacement.
- Wiring: Plan the wiring layout for the thermocouples. Ensure that the wires are properly insulated and protected from damage. Use appropriate connectors and terminals to ensure a reliable electrical connection.
Step 3: Preparing the Heat Exchanger
Before installing the thermocouples, it's important to prepare the heat exchanger. Here are the steps to follow:
- Shut Down the System: Ensure that the heat exchanger is shut down and all power sources are disconnected. This will prevent any accidents or injuries during the installation process.
- Clean the Installation Area: Clean the area where the thermocouples will be installed. Remove any dirt, debris, or contaminants that may interfere with the installation or affect the performance of the thermocouples.
- Drill Holes (if necessary): If the thermocouples require a thermowell or a mounting bracket, drill the necessary holes in the heat exchanger. Make sure the holes are the correct size and depth for the thermocouple or mounting hardware.
- Install the Thermowell or Mounting Bracket: If using a thermowell or a mounting bracket, install it in the drilled holes. Make sure it is securely fastened and aligned properly.
Step 4: Installing the Thermocouples
Now it's time to install the thermocouples. Follow these steps:


- Insert the Thermocouple: If using a thermowell, insert the thermocouple into the thermowell. Make sure it is inserted fully and securely. If using direct insertion, carefully insert the thermocouple into the heat exchanger through the pre-drilled hole.
- Secure the Thermocouple: Use the appropriate mounting hardware to secure the thermocouple in place. This may involve tightening a nut or bolt, or using a clamping mechanism. Make sure the thermocouple is firmly attached and will not move during operation.
- Connect the Wires: Connect the thermocouple wires to the appropriate terminals or connectors. Make sure the connections are tight and secure. Use a multimeter to check the continuity of the wires and ensure that there are no short circuits.
- Insulate the Wires: Insulate the thermocouple wires to protect them from damage and to prevent any electrical interference. Use appropriate insulation materials, such as heat-resistant tape or conduit.
Step 5: Testing and Calibration
After installing the thermocouples, it's important to test and calibrate them to ensure accurate temperature measurements. Here's how:
- Power On the System: Once the thermocouples are installed and the wiring is connected, power on the heat exchanger and allow it to reach its operating temperature.
- Check the Temperature Readings: Use a temperature indicator or a data logger to check the temperature readings from the thermocouples. Compare the readings with the expected temperature range to ensure they are within acceptable limits.
- Calibrate the Thermocouples (if necessary): If the temperature readings are not accurate, you may need to calibrate the thermocouples. This can be done using a calibration device or by sending the thermocouples to a calibration laboratory.
- Monitor the Temperature: Continuously monitor the temperature readings from the thermocouples to ensure that they remain stable and accurate. If any issues are detected, take appropriate action to address them.
Step 6: Maintenance and Troubleshooting
Proper maintenance and troubleshooting are essential to ensure the long-term performance of the thermocouples. Here are some tips:
- Regular Inspections: Conduct regular inspections of the thermocouples to check for any signs of damage or wear. Look for loose connections, frayed wires, or corrosion.
- Cleaning: Clean the thermocouples periodically to remove any dirt, debris, or contaminants that may affect their performance. Use a soft brush or a cloth to clean the thermocouples gently.
- Replacement: If a thermocouple is damaged or no longer providing accurate temperature readings, replace it immediately. Make sure to use the same type and model of thermocouple to ensure compatibility.
- Troubleshooting: If you encounter any issues with the thermocouples, such as inaccurate temperature readings or intermittent signals, troubleshoot the problem. Check the wiring connections, the thermocouple itself, and the temperature indicator or data logger.
Conclusion
Installing thermocouples in a heat exchanger is a critical process that requires careful planning, proper installation, and regular maintenance. By following the steps outlined in this blog post, you can ensure accurate temperature measurement and the efficient operation of your heat exchanger. As a thermocouples supplier, we are committed to providing high-quality thermocouples and expert advice to help you with your installation needs. If you have any questions or need further assistance, please contact us to discuss your requirements and explore potential partnerships.
References
- "Thermocouple Handbook" by Omega Engineering
- "Temperature Measurement" by John Wiley & Sons