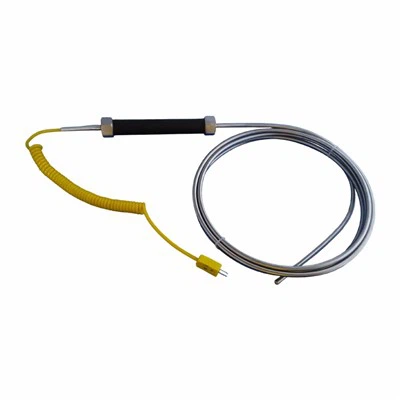
Hey there! I'm from a wire thermocouple supplier, and today I'm gonna walk you through the process of installing a wire thermocouple in a pipe. It might sound a bit tricky, but with the right steps, you'll have it up and running in no time.
Why Use a Wire Thermocouple?
First off, let's talk about why you'd want to use a wire thermocouple in a pipe. These little devices are super useful for measuring temperature accurately in various industrial and commercial applications. They're durable, reliable, and can withstand high temperatures and harsh environments. Whether you're working in a chemical plant, a food processing facility, or a power generation plant, a wire thermocouple can help you keep tabs on the temperature inside your pipes.


Tools and Materials You'll Need
Before you start the installation process, you'll need to gather a few tools and materials. Here's a list of what you'll need:
- Wire thermocouple: Make sure you choose the right type of thermocouple for your application. You can check out our Armored Thermocouple, Magnetic Thermocouple, or Explosion-proof Thermocouple options.
- Pipe fitting: You'll need a fitting that's compatible with your pipe and the thermocouple. This could be a threaded fitting, a compression fitting, or a weld-in fitting.
- Wrenches: You'll need a set of wrenches to tighten the fitting and secure the thermocouple in place.
- Sealant: To prevent leaks, you'll need a sealant that's compatible with the pipe and the fitting.
- Electrical tape: You'll need electrical tape to insulate the thermocouple wires and prevent short circuits.
Step-by-Step Installation Process
Now that you have all the tools and materials you need, let's get started with the installation process. Here are the steps you'll need to follow:
- Prepare the Pipe: First, you'll need to prepare the pipe for the thermocouple installation. This involves cleaning the area where the fitting will be installed and making sure it's free of debris and dirt. You may also need to drill a hole in the pipe if you're using a weld-in fitting.
- Install the Fitting: Once the pipe is prepared, you can install the fitting. Make sure you choose the right type of fitting for your application and follow the manufacturer's instructions for installation. Use a wrench to tighten the fitting securely, but be careful not to over-tighten it, as this could damage the pipe or the fitting.
- Insert the Thermocouple: After the fitting is installed, you can insert the thermocouple into the fitting. Make sure the thermocouple is inserted all the way into the fitting and that it's centered in the pipe. You may need to use a wrench to tighten the thermocouple in place.
- Seal the Fitting: To prevent leaks, you'll need to seal the fitting with a sealant. Apply the sealant to the threads of the fitting and the thermocouple, and then tighten the fitting securely. Make sure the sealant is evenly distributed and that there are no gaps or leaks.
- Connect the Wires: Once the thermocouple is installed and the fitting is sealed, you can connect the wires. Use electrical tape to insulate the wires and prevent short circuits. Make sure the wires are connected to the correct terminals on the thermocouple and that they're securely fastened.
- Test the Thermocouple: After the wires are connected, you can test the thermocouple to make sure it's working properly. Use a multimeter to measure the voltage output of the thermocouple and compare it to the manufacturer's specifications. If the voltage output is within the specified range, the thermocouple is working properly.
Tips and Tricks
Here are a few tips and tricks to help you install a wire thermocouple in a pipe:
- Choose the Right Thermocouple: Make sure you choose the right type of thermocouple for your application. Consider factors such as temperature range, accuracy, and durability when choosing a thermocouple.
- Use the Right Fitting: Make sure you choose the right type of fitting for your application. Consider factors such as pipe size, material, and pressure when choosing a fitting.
- Follow the Manufacturer's Instructions: Make sure you follow the manufacturer's instructions for installation. This will help you avoid common mistakes and ensure that the thermocouple is installed correctly.
- Test the Thermocouple: Before you start using the thermocouple, make sure you test it to make sure it's working properly. This will help you avoid problems and ensure that the thermocouple is providing accurate temperature readings.
Conclusion
Installing a wire thermocouple in a pipe is a relatively simple process, but it requires careful planning and attention to detail. By following the steps outlined in this blog post and using the right tools and materials, you can install a wire thermocouple in a pipe quickly and easily. If you have any questions or need further assistance, don't hesitate to contact us. We're here to help you find the right thermocouple for your application and ensure that it's installed correctly.
If you're interested in purchasing wire thermocouples or any of our other products, please don't hesitate to reach out to us. We're always happy to discuss your needs and provide you with a quote. Let's work together to find the best solution for your temperature measurement needs.
References
- Manufacturer's instructions for wire thermocouples and pipe fittings
- Industry standards for temperature measurement and installation